

Well, hello. Been a LONG time, right? Yeah, sorry :( I had dilemmas of my own, I was busy helping other repos and I forgot this one. Sorry about that.
Well, what is new? I have a CODEDOC blog, and as a change, this blog is hosted on Vercel.
I learnt Next.js, and am helping on multiple projects. Fun.
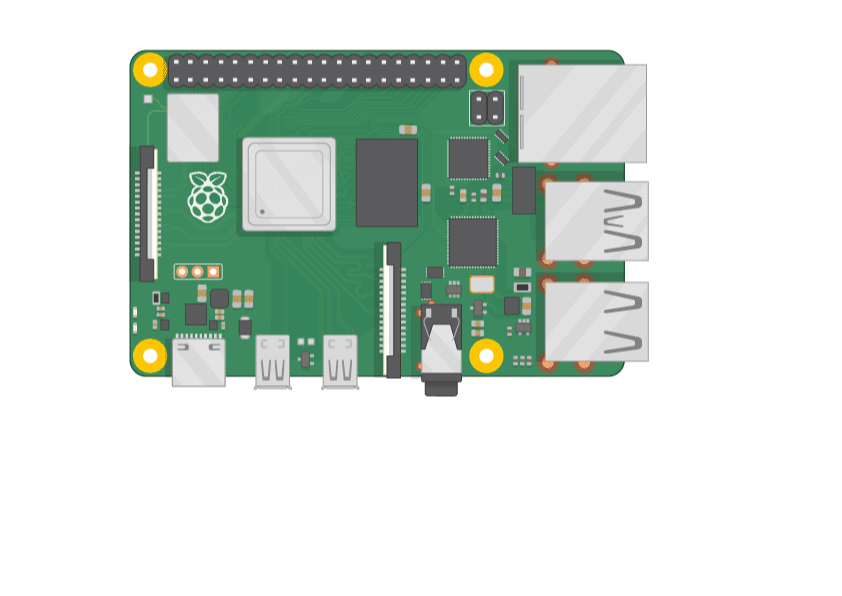
I now have an addition to my creativity and learning of Linux. A Raspberry Pi.
It is worth it, and I just love it.
So, can we start onto the introduction?
Yes.
What is the Raspberry Pi?
Now, have you ever wished for a minicomputer that can do the job like you do at a behemoth and a mammoth computer? Well, I have.
The Raspberry Pi is a really small minicoputer that can get you up and runnin’ with just little things. All you need is simple: The Raspberry Pi, a power cable and an SD Card(for the OS) and if you want to plug it into a monitor, a case, a micro-HDMI to HDMi cable by Raspberry Pi and a keyboard+mouse combo/individual sets. You can get any variant, a 2 GB or 4 GB or 8 GB Raspberry Pi.
After I got mine, I flashed Ubuntu 21.04 on to the image. It worked well, except that it was laggy. I didn’t have an extra monitor(and I didn’t need one).
So what?
I plugged it into my TV.
My TV showed that the display was 30 frames per second, meaning that the display refreshes 30 times every second. It was rather slow and I advise you all to install Raspberry Pi OS if you want to use it on a TV. Use the image that gives the desktop too, since you need that later.
So, after I reflashed Raspbian(Raspberry Pi OS running Debian and only Debian) kinda twice/thrice, I had good luck. I at first hated the PIXEL desktop but then started liking it since it looked simple. And it was never laggy.
Now, beginners who just bought a Raspberry Pi and don’t know how to get it up and running, you are in luck.
This is how I boot it(from the Getting Started Raspberry Pi project)
My experience
Well, it was good. I loved the PIXEL desktop and tested Xfce on it which works good.
I recommend that you use a 32GB+ SD Card since the OS could take a lot of space.
Well, let’s talk core parts. I like the Raspberry Pi but hate the overheating. Within five minutes of using the Pi, I get a whopping 68 degrees celsius. But by blowing cold(not too cold tho) air on the Pi, you can cool it down. But it’s fine, nothing else is wrong.
I recommend getting a separate monitor for the Pi itself, and if you want, a custom case that can cool the Pi down, the official keyboard and mouse and 128 GB of storage(just to be on the safe side, if you download a lot of things, 128 gigs can do.)
I also recommend using an external hard drive to store the files there, thereby saving more storage. The SanDisk 500 GB rugged(?) disk can do.
Note: Remember to plug the drive into the USB-3 slots for faster performance. For recognition, the USB tongues on the USB 3 slots look blue.
Getting the Pi up and running
So, for this, you need your Raspberry Pi, a power source, and your existing computer.
Firstly, get the Raspberry Pi OS image(around 1.2 GB). Make sure to get the one with the desktop since you need that later.
Link for the images: https://www.raspberrypi.com/software/operating-systems/
I recommend either image(you can download it via clicking the link, I got it from the official Raspberry Pi website):
- The image with the desktop preinstalled(PIXEL DE on top of Debian Buster)
- The lite version, 450 MB in storage, no DEs, so you can get one on the Pi easily.
Next, get the Raspberry Pi Imager. I recommend this since it flashes official images.
Get your SD card adapter and plug it in your computer.
Then, wait until your computer recognizes it. After that, start the Imager app you installed before.

Imager from https://raspberrypi.com/software
Then, click the OS button, scroll down and select the Use Custom button and select you recently downloaded Raspberry Pi OS image.
Then, click Choose Storage and select the SD Card.
Wait for 5-10 minutes, the OS will be flashed and verified(why do you need that?).
Once you get a screen like below, close the dialog and eject(carefully) the SD Card.

Next, plug your SD Card to the Raspberry Pi. Just flip the Pi, and you will see a slot near the power socket. Plug the SD Card, the logo facing up. Then, plug into a power source, get the HDMI cable(for using it with a display), plug it into your monitor/TV, and get your keyboard and mouse. Boot the Pi up.
After the four raspberries, you will be welcomed into the desktop(if you got the desktop one)

After the boot, you will be welcomed by the Welcome window. Click the Next button and configure the Raspberry Pi.
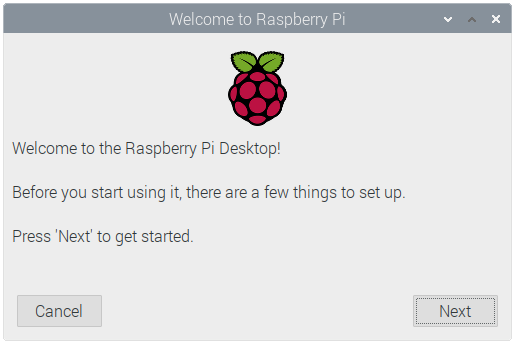
There you go! Your Raspberry Pi is ready to start working!
Additional steps(if you want)
Enabling SSH, VNC, etc.
GUI method(best for beginners)
Now, on your Raspberry Pi, open the Menu button(it has a raspberry on it) and check evry folder. Once you find an app called “Raspberry Pi Configuration”, open that and check Interfaces. Once you find a list of things like Camera, SSH and VNC, toggle your choices and click the Apply button.
The Terminal method(for the expert and lord of Raspbian)
- Open Terminal
- Type
sudo raspi-config - Check
Interface methodsand toggle everything as you wish.
Set aliases as shortcuts
Now, I am one of the people who want the Raspi-Config to boot up when I type rpi-config. Saves a lot of time.
This is how you do it.
- Open Terminal
- Type
sudo nano ~/.bashrc - Type
alias shortcommand="large command"whereshortcommandis your shortened one andlarge commandis it’s big version. - Save the file with Ctrl + S and exit via Ctrl + X
- Source the
~/.bashrcfile(source ~/.bashrc)Install other desktops(Xfce, MATE, LXDE, PIXEL(in case you use Raspbian Lite))
Prerequisites:
- LightDM
sudo apt install lightdm
- Xorg
sudo apt install xserver-xorg
And next step!
MATE
Run this on the terminal
sudo apt install mate-desktop --no-install-recommends mate-desktop-environment-core mate-themes mate-session-manager xinit mate-terminal mate-applets pluma software-properties-gtk xserver-xorg
sudo update-alternatives --config x-session-manager
Choose the one related to MATE, type the corresponding number and hit enter, then restart or type startx if on Raspbian Lite.
Xfce
On the terminal, run this:
sudo apt install xserver-xorg xfce4 xfce4-goodies
sudo update-alternatives --config x-session-manager
Choose /usr/bin/startxfce4’s number on the left side, and type startx(if on lite) or sudo reboot if on the desktop version.
PIXEL
Just run this(make sure you have Xorg installed)
sudo apt install raspberrypi-ui-mods
sudo update-alternatives --config x-session-manager
Choose /usr/bin/startlxdepi or something similar.
End
Well, hope you like this! This is 161 lines(raw mode on Gitpod, and it is extra due to the spacings here and there.) of Markdown code and the 162th one is blank. EOB(End of Blog). See ya!